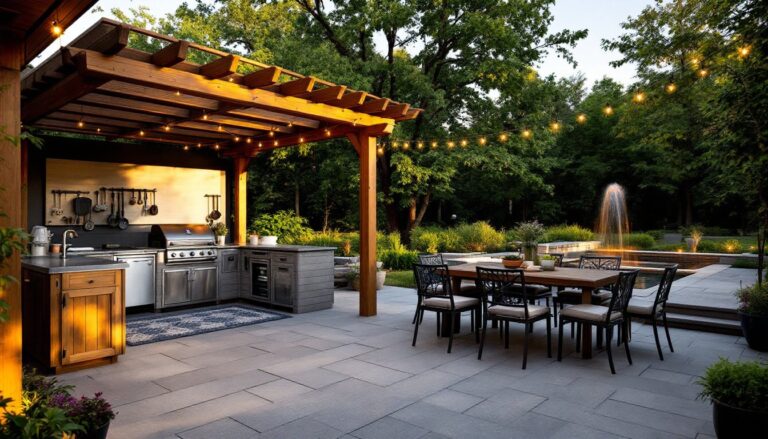
A farmhouse kitchen backsplash does more than protect your walls from splashes, it’s the anchor of your kitchen’s style. Whether you’re working with weathered finishes, clean white surfaces, or rustic accents, the right backsplash ties the room together and creates a cohesive, lived-in aesthetic that feels both polished and approachable. This guide walks you through six proven farmhouse backsplash approaches, from classic subway tile to textured shiplap, with practical tips on materials, installation difficulty, and when to call a professional. Each option works well with farmhouse style, but the best choice depends on your budget, maintenance comfort, and the overall kitchen layout you’re working with.
Table of Contents
ToggleKey Takeaways
- A farmhouse kitchen backsplash combines style and function, anchoring your kitchen’s design while protecting walls—choose from six proven approaches including subway tile, shiplap, brick, patterned tiles, painted wood, and beadboard.
- Classic subway tile remains the most accessible farmhouse kitchen backsplash option, costing $5–$15 per square foot with proper wall prep and level measurements ensuring a polished, amateur-proof result.
- Shiplap and beadboard offer textured warmth but require waterproofing or protective tile behind heat sources, making them better as accent features or paired with tile in lower-splash areas.
- Proper surface preparation—checking walls are level within 1/8 inch per 10 feet and installing cement board underlayment if needed—prevents mold and tile failure, making it the most critical step before installation.
- Patterned and mosaic tiles inject farmhouse personality cost-effectively ($3–$20+ per square foot) when used as accent bands rather than full-wall designs, which can feel busy in smaller kitchens.
- Know your DIY limits: straight tile layouts and painted wood backsplashes are beginner-friendly, while brick, intricate mosaics, and complex patterns benefit from professional installation to avoid costly mistakes.
Classic Subway Tile Backsplash
Subway tile remains the farmhouse kitchen workhorse, and for good reason. A standard 3-inch by 6-inch white or cream subway tile laid in a running bond (staggered) pattern reads clean and timeless. Pair it with a darker grout (charcoal, warm gray, or taupe) to add visual interest without overwhelming the space.
For installation, you’ll need a tile cutter or wet saw, thin-set mortar, a notched trowel, and grout. If your walls are already smooth and primed, prep time is minimal. Measure the backsplash area (typically 18 to 24 inches above the countertop, though some designs extend to the underside of cabinets), and plan your tile layout so you avoid thin slivers at the corners, this step prevents a sloppy, amateur appearance.
Wear safety glasses and a dust mask when cutting tiles. If your walls have moisture issues or aren’t level within 1/8 inch per 10 feet, install a cement board underlayment first: this prevents mold and tile failure. Most homeowners can handle straight subway layouts, but outside corners and around electrical outlets require careful cuts. A basic 3-by-4-foot backsplash is a good first-time tile project: anything larger or more complex benefits from professional installation. Expect to pay $5 to $15 per square foot for materials and installation, depending on your region and tile quality.
Shiplap Wall Backsplash
Shiplap has become synonymous with farmhouse style, and it works beautifully behind a stove or sink if you treat it carefully. Shiplap is wooden planks (typically 6 to 8 inches wide) with interlocking edges that create a clean, horizontal line when installed. Use primed or pre-finished pine, cedar, or engineered shiplap, solid hardwoods are overkill and more prone to warping near heat.
Before installation, acclimate the wood to your kitchen for 48 hours so it adjusts to humidity. Measure and cut planks to length, and fasten them to wall studs or a backing board using 1.25-inch finish nails or a pneumatic nailer. Wear eye protection and gloves during cutting and nailing. Start at the bottom and work upward, checking level every two to three planks. Stagger end joints so they don’t align vertically.
Shiplap backsplashes have limitations: they’re not ideal directly behind a stovetop (heat and moisture damage the finish) and require regular sealing or waterproofing. A better approach is to install shiplap over a ceramic tile or stainless-steel backsplash for visual appeal without the maintenance headache. Paint shiplap with two coats of semi-gloss or satin kitchen-grade paint for easier cleanup. A 3-by-4-foot shiplap backsplash costs $150 to $400 in materials: DIY installation is straightforward for confident builders.
Rustic Brick and Stone Backsplash
Exposed brick or reclaimed stone creates undeniable character, especially in farmhouse kitchens with open shelving or a large island. Real brick demands a structural inspection, confirm your walls can support the weight, typically 30 to 50 pounds per square foot. Thin brick veneer (about 3/8 inch thick) is a lighter alternative that mimics full-depth masonry without requiring structural upgrades.
Installation involves applying a bonding agent to your wall, then setting brick in thin-set mortar using a notched trowel. Grout between bricks with a concave profile (this sheds water better than flush joints). This isn’t a beginner project: uneven mortar lines and poor adhesion lead to brick failure or falling tiles. Consider hiring a tile contractor for this work. If you’re handy and determined, start small, a 2-by-3-foot section behind a prep sink is less risky than covering the entire wall.
Reclaimed or antique brick adds authentic charm but costs significantly more ($8 to $20 per square foot for material alone) and is harder to cut. New thin brick runs $3 to $8 per square foot. Many kitchens pair a stone or brick backsplash with stainless-steel appliances and cream cabinetry for balance, too much texture competes with other design elements. Seal brick annually to resist staining and moisture.
Farmhouse Patterned and Mosaic Tiles
If solid color feels too simple, patterned tiles or mosaics inject personality while staying farmhouse-appropriate. Look for designs inspired by vintage French, Spanish, or Italian tiles, think blue and white patterns, subtle geometry, or hand-painted effects. Cement tiles, glazed ceramic, and porcelain all work: cement tiles are softer and more porous, so they require sealing to resist staining from cooking oils and water.
Layouts matter more with patterns. Odd-sized mosaics or decorative tiles work best as accent bands (running horizontally across a 12-inch-wide strip, for example) paired with neutral subway or solid tiles. Full-wall patterned backsplashes can feel busy, especially in smaller kitchens. Plan your layout on paper first, accounting for grout lines, tile placement relative to outlets, and how patterns align at corners.
Installation is similar to subway tile, thin-set mortar, a notched trowel, and grout, but requires more attention to alignment and pattern matching. Patterned tiles cost $3 to $20+ per square foot depending on complexity and origin (vintage reclaimed tiles are pricier than new reproductions). This is a weekend DIY project for someone comfortable with basic tile work, or hire a professional if your layout is intricate. Seal patterned tiles after grouting to protect the finish from moisture and grease.
Painted Wood Backsplash
A painted wood backsplash offers a quick, budget-friendly way to achieve farmhouse style without the permanence of tile. Use 1/4-inch plywood, shiplap, or beadboard (discussed separately below) and prime with a bonding primer designed for kitchens. Choose a semi-gloss or satin finish paint in whites, creams, soft grays, or warm earth tones, glossy finishes are easier to wipe clean but can look plastic-y.
Install backing boards by fastening them to wall studs with 1.25-inch nails or screws. Seal seams and corners with paintable caulk. Sand between coats of primer and paint for a smooth, durable finish. This approach tolerates splash-back better than raw wood but isn’t waterproof: avoid direct contact with standing water or steam from a pot-filling faucet. If your cooktop vents directly below the backsplash, maintain 6 inches of clearance from the heat source.
Cost runs $50 to $200 in materials for a 3-by-4-foot area, depending on wood choice and paint quality. Installation is beginner-friendly: mark stud locations, fasten boards, prime, paint, and caulk. Two to three weekends covers most kitchens. Repaint every 5 to 7 years as finishes wear. Many homeowners use a painted wood backsplash as a stepping stone to tile, proving the design works before investing in permanent materials. home renovation ideas examples for more budget-friendly kitchen updates.
Beadboard Backsplash
Beadboard is a style of wooden paneling (usually pine) with decorative grooves running vertically. It’s a classic farmhouse feature that works particularly well in cottages, coastal kitchens, or rooms with open shelving. Install 1/2-inch thick beadboard to wall studs using 1.25-inch finish nails or a pneumatic nailer, spacing fasteners every 12 inches. Like shiplap, acclimate the wood to your kitchen’s humidity beforehand.
Paint beadboard with kitchen-grade primer and two coats of semi-gloss paint for durability. The grooved texture collects dust, so plan on occasional dusting and touch-up painting. Beadboard isn’t ideal behind a stovetop or in high-splash zones: use it in accents or pair it with a protective tile or stainless-steel trim at the cooking surface.
Cost-wise, beadboard runs $1 to $3 per linear foot for materials, making it cheaper than most tile options. Installation is straightforward for anyone comfortable with a nailer and level. Many kitchens layer beadboard above tile for a split backsplash effect, cream or white tile on the bottom, painted beadboard on top, creating depth and visual interest without overwhelming the space. This mixed approach bridges traditional and modern farmhouse styles beautifully. Resources like Southern Living and The Kitchn showcase stunning mixed-material backsplash designs for further inspiration.
Conclusion
Your farmhouse kitchen backsplash sets the tone for the entire space. Whether you choose the timeless simplicity of subway tile, the textured warmth of shiplap, the rustic character of brick, or the artistry of patterned tiles, success depends on honest assessment of your DIY skill level, your willingness to invest time in prep work, and knowing when to hire a professional. Start with a clear material choice, measure twice, and don’t rush installation, most backsplash failures trace back to poor surface prep or misaligned layout, not materials. Your kitchen will thank you for the care.